The User Interface
Quick Guide
The main areas are shown in this image with descriptions below.
You can move around all areas by using the Tab and Arrow keys or by clicking. Hover over the icons and labels for tooltips. The main menu can be accessed by using the ALT key and the underscored letter for the menu option.

Author / Output / Review
Author mode allows you to work on creating your project. When you are ready, click the Output tab. This accesses what was in the Output Pod in classic versions along with other features that are output related, such as Skins for example.
The Review tab allows you to start the Review process and share the output with Subject Matter Experts.
For authors who only create content and who are not required to generate Outputs or send topics for review, those tabs can be deselected in Edit > Preferences > User Interface.
Project Toolbar
The Project toolbar controls what is displayed in the Project Component Panel alongside. For simplicity, what you see here when you click an icon in the Project toolbar is described in separate topics. See the links below or the Table of Contents.
- Contents
- Table of Contents
- Index
- Glossary
- See Also
- Microcontent
- Condition Tags
- Variables
- Citations
- Snippets
- Topic Layouts
- Browse Sequences
- Reports
- Translations
- Scripts
- Find and Replace
If you click the guillemets (double chevrons), the text labels can be toggled. Useful while you familiarize yourself with the icons and then you can hide them to give yourself more working space. There are tooltips when you hover over an icon. The selected icon is blue and the panel alongside displays the information related to your selection, Contents in the image above.
Menu and Standard Toolbar Toolsets
The Menu and Toolbar are much simpler than before. The standard toolbar comprises three toolsets.
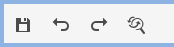
On the left are icons to save, undo /redo, and find and replace.
Above the authoring area are the icons you will need as you work. They will change according to what you are working on.

On the right are icons to change your view or quick generate.
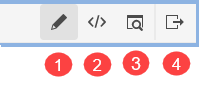
- Edit replaces Design in Classic versions of Adobe RoboHelp.
- Source replaces HTML in earlier versions of Adobe RoboHelp.
- Preview lets you see how the topic will appear in a browser.
The preview opens in the Authoring Area so no popup any more, it opens in the same panel instantly. Above the topic when in Preview mode, there is an icon allowing you to open the topic in a browser. - Quick Generate opens a list of your outputs.
Those shown with the eye icon have been generated previously.
If you don't need to change the settings, you just tick the outputs you want to generate and click Generate.
If you do want to edit them or need to check the settings, you can tick the presets that you want to change or view and then click Edit.
This replaces Batch Generate in earlier versions.
 In Classic versions of Adobe RoboHelp if you selected text in Edit View and changed to Source, the source code was also selected. Now you can also select text in Source View and it will be selected when you return to Edit View.
Donations
If you find the information and tutorials on my site save you time figuring it out for yourself and help improve what you produce, please consider making a small donation.