Contents Panel
The Contents Panel shows all the topics in the project, rather like Project Manager in older versions of Adobe RoboHelp.
Working In The Contents Panel
What you will see here is an assets folder and the folders for your topics. It is recommended that you use the assets folder for images, CSS files and suchlike but you can structure this according to your own preferences.
If you paste images into a topic they will be saved in assets > images but you can move them to your preferred folder.
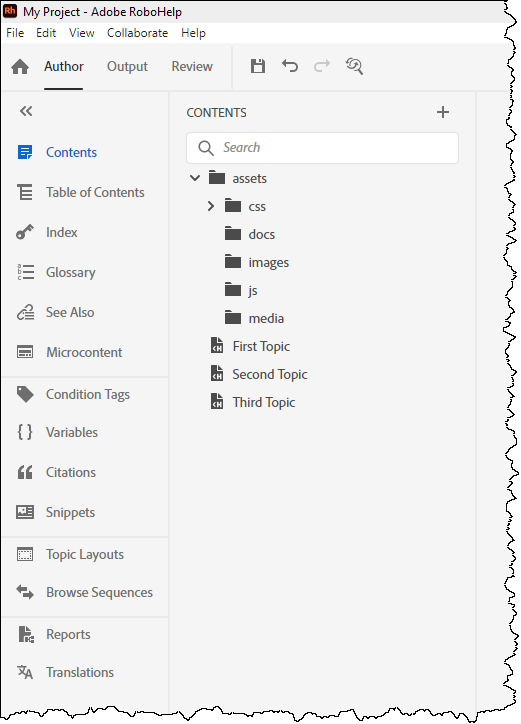
 The search field lets you quickly find topics or file types. Enter part of the name of the file you are looking for or the file type preceded by a dot. This can save a lot of time finding what you want to work on.
- If you look at the project in File Explorer, you will see the structure is different. The root folder contains the rhpj file that opens the project.
- Your files are in the Contents folder where you will also find the Assets folder. All the other folders are for the Adobe RoboHelp internal files.
- You may also see JSON files in your project. These are files used by Adobe RoboHelp. Don't touch!
The idea of the Assets folder is to keep your images, CSS and suchlike separate from your topics with their own organisational structure.
Right click any folder or file and you will see the various options available, similar to previous versions.
When you open a topic that is in the Contents Panel, the content appears alongside with its properties in the Properties Panel. See Working on Topics
The Contents Panel Context Menus
In the Contents Panel the context menu changes according to whether you have focus on a blank area, a folder or a file.
Context menus can also be accessed by clicking in area required and pressing Shift + F10.
Blank Area
Blank Area means anywhere below or to the left of the list of contents.
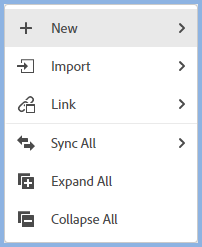
 There's a great new feature here - Import Folder. Click that and you can then browse to any available drive and select a whole folder of, for example, images or you can browse and select multiple images and add them in one go. The same option is in the Folder context menu.
Don't confuse this with Resource Linking, it's an alternative way of adding to the pool of resources without having links.
Folder Menu
Right click on any folder to see this context menu.
Expand will expand the folder with focus and all of its sub-folders.
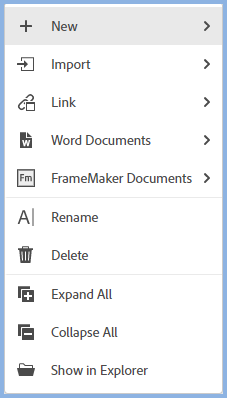
File Menu
The options will vary according to the file type selected. The menu shown below is for topics.

The context menu has various options including Locate in Topic in a TOC and Show in Explorer to see the topic File Explorer.
Save As PDF allows you to quickly create a PDF of that topic only. The PDF will include any master page applied to the topic. You can also Save as PDF from a topic context menu.
If the Locate in TOC option does not show, it is because the topic is not in any TOC. That's a useful way of checking.
Properties
With a topic open, the Properties Panel on the right of the screen shows the properties and allows them to be edited.

- Content displays the properties of whatever is selected.
- Topic displays to topic properties.
- Styles displays the styles in the selected CSS.
- Spell Check accesses the spell check options.
Zoom
On the View menu can select various options to make the authoring area content larger or smaller.
- You can use the shortcuts CTRL = to zoom in or CTRL - to zoom out on the alpha keyboard.
- You can use CTRL with the mouse wheel.
- You can use CTRL 0 to return to 100%.
- You will see the size as you zoom in the bottom right corner.
Donations
If you find the information and tutorials on my site save you time figuring it out for yourself and help improve what you produce, please consider making a small donation.