Project Reviews
Project Reviews enable content to be shared with other authors, Subject Matter Experts (SMEs) and others. They can be shared one to one or to a group so that each person can see comments and edits made by others.
 This release does not have full functionality and has been included just so that you can get some idea of how it will work. It is functional enough to undertake a simple review or to try it out. Updates will add much more functionality and address the known issues.
Creating a Review
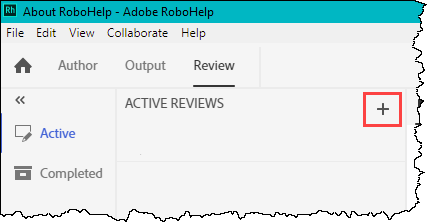
Click the Review Tab and then click the + icon to start a new review.
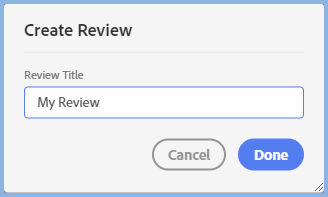
Enter a name for your review.
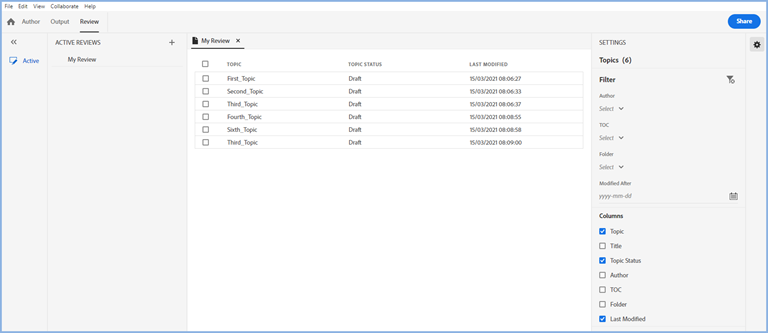
When you click Done, you will see a list of all the topics in your project along with various filters and options for the columns displayed.
The Filters
In the initial release of 2020 you will not be able to filter by TOC. The dropdown will show all the TOCs in one line. That option will be added in Update 1.
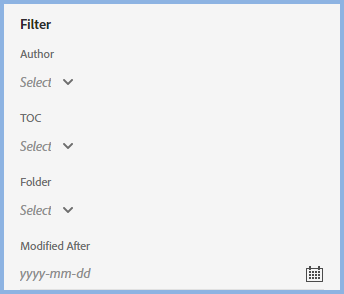
The Columns

Selecting Topics for Review
You can either select all the topics by selecting the top check box or select just those you want. After the review has been sent to the reviewers you cannot add new topics to it. Create a new review for additional topics.
 Initially you will need to look at reviewers comments and make the changes manually. If you make changes between submtting the topic for review and editing based on the review, you will need to allow for the differences
Updates will add the ability to accept a reviewers changes and apply them automatically. How to handle that scenario will be covered when the functionality is added.
Send for Review
Once you have selected the topics to be reviewed, you click the Share button to access this dialog.
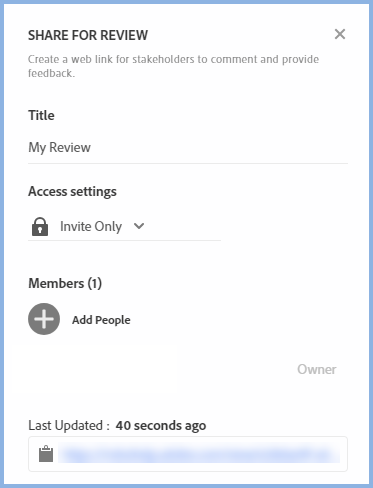 |
Access Settings Invite Only limits the review to those you select in Members. Members will automatically be sent an invitation. You can also send the link to members. Anyone who has the link but is not in the list will not be able to access the review. The address used must be an Adobe ID, an Enterprise login or a Google / Facebook / Apple login. If you send the review to an address that does not meet that criteria, the reviewer can:-
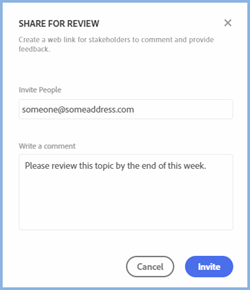
If they attempt to log in with any other address, they will not be able to access the review. Public allows anyone with the link shown at the bottom of the dialog to access the review. There is an option to require a password. Members Click the + icon to add reviewers.
Click Invite to return to the previous screen where you will see who is part of the review process.
When you have completed the invitations, click X in the dialog shown in the screenshot on the left. |

The Review
Invitation Only
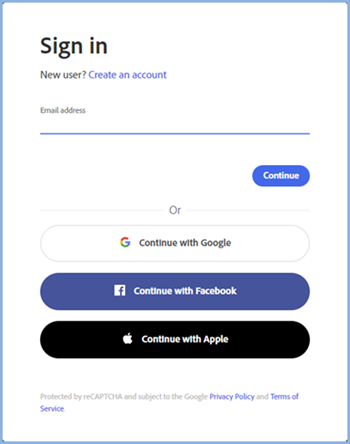
The reviewers will each get an email by virtue of you having added their name to the list of Members or because you have emailed them with the link. As above, they must use the email address to which you sent the invitation and it must meet the criteria.
Public Review
Anyone with the link can review but they will have to use one of the options below.
Opening the Review
When the reviewer(s) follow the link, unless they are already logged in, they will be required to log in using a verified ID as below.
After logging in they will see a list of all the topics and when they double click on one, it will be displayed in the same way that you see in the authoring area when working on the source topics.
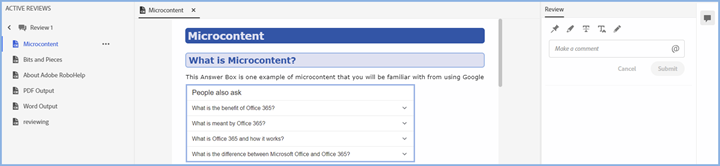
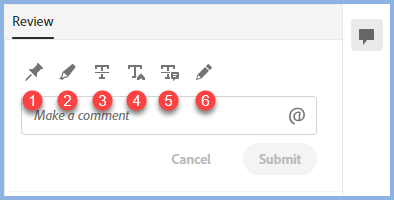
On the right they will see the editing tools.
-
The Pin icon allows the reviewer to place a pin and add a comment. Initially the pin will just have an outline but when the reviewer clicks Submit, it will be more obvious.
-
By clicking the pencil icon the reviewer can drag across some text to highlight it.
- Click the icon and then select some text to apply strikethrough. The reviewer has to add some text explaining why they have applied strike-through to enable the Submit button.
-
By clicking this icon the reviewer can enter the new text in the dialog that will be displayed. They will also need to use the Pin icon to indicate where the additional text is to appear.
-
Click this icon to replace text. Select the text and strikethrough will be shown. Add the new text below the icons.
- This icon allows the reviewer to draw a free format shape.
When using these icons the reviewer will see a red circle. Using that they can change the color of the strikethrough and other edits.
Should the user click the wrong icon and want to change to another, they should click the icon again.
Each editing session is uploaded to the server. If the reviewer makes an incorrect edit, they can simply make a further edit to correct their submission. The reviewer will get an email to notify them.
Actioning the Review Comments and Edits
When a reviewer submits their response the author will receive an email advising them of the changes. The Review should then be accessed.
The Active option will be selected. Click the twisty for the review you want to work on and the topics will be listed below.
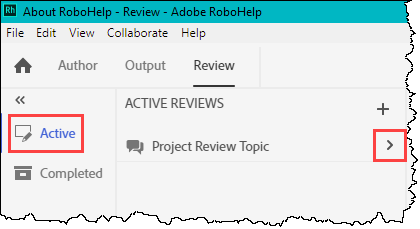
When you click a topic it will open in the center panel showing all the submissions to date on the right.
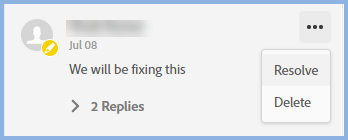
In the initial release, the Resolve and Delete options will not be enabled. You will need to switch from Review mode to Author mode and make the changes manually.
Completed Reviews
Completing
This feature will be added in a future update.
Deleting
You can right click the review in the Active Reviews panel and select Delete. The local copy of the review will go to the recycle bin and the copy on the Adobe Cloud server goes to the recycle bin there. That copy will be deleted in accordance with Adobe's terms and conditions or you can delete it manually.
Donations
If you find the information and tutorials on my site save you time figuring it out for yourself and help improve what you produce, please consider making a small donation.